Protect hero views
Put seams underneath, behind, inside, or along existing construction boundaries.
Final gate before the engine
This is the "distrust your memory" step. Drop the exported file, not a screenshot of your scene. The Bench reports texel density against your brief, UV coverage, texture sizes, material count, names and transforms, and writes a check report you can hand in with the asset.
Where is export (and re-import) in your app? Pick your apps below; your choice is remembered across lessons.
Open character-rig.glb from Your shelf on the Bench above, or choose its downloaded GLB. UVs describe where an image lands on the surface; bones describe how that surface moves. Keep both in the same GLB.
Dense generated triangles can make seam editing cumbersome. Retopologize before your final unwrap if the character needs cleaner animation; transfer or repaint skin weights after changing topology.
Blender UV Editor documentation · Continue to rigging · Continue to animation · Back to Character Creator
Follow one box from a planned seam to a flattened layout and checker test.
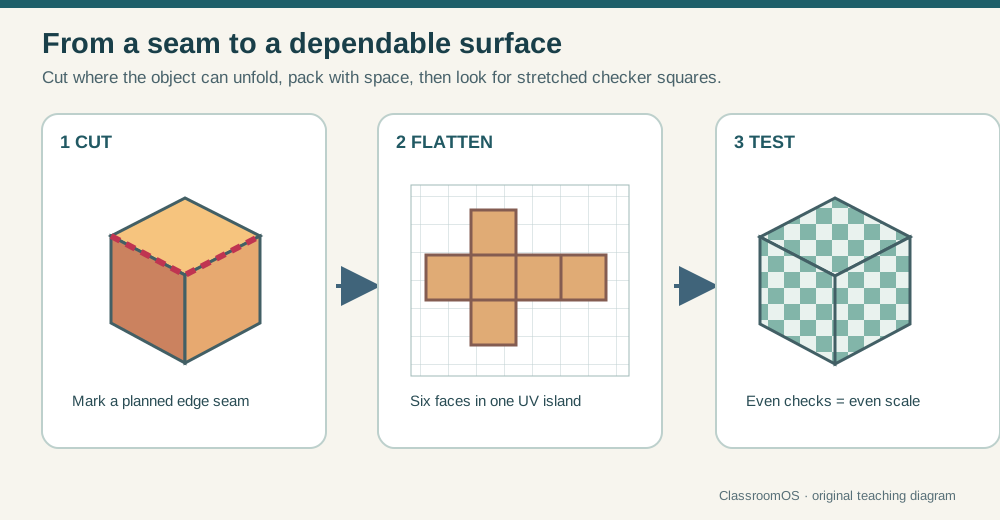
Start with the editable technique workshop above. Reuse your model in the next lesson. The production workflow below extends the browser exercise and helps you test work made in your chosen app.
Lesson 04 · 65 minutes · Pipeline reliability
UVs decide how a flat image wraps around a 3D form. Export settings decide whether materials, scale, pivots, and names survive the trip into the engine. Today, the pipeline itself is the product.
Flatten with intent
Put seams underneath, behind, inside, or along existing construction boundaries.
Add cuts around cylindrical ends and at sharp direction changes so islands can lie flat.
Keep wood grain, cloth weave, panels, and bricks oriented consistently.
A hard shading edge commonly needs a UV split; test checker distortion before painting.
Use pixels fairly
UV packing simulator
Drag each island inside the 0–1 square. Orange marks the selected island; red reveals overlaps. Leave visible padding at the boundary, rotate awkward pieces, then complete the export contract.
Start: Separate the overlapping islands and keep them inside the padded square.
Portable materials
| Map | Color space | Principled input |
|---|---|---|
| Base color | sRGB | Base Color |
| Roughness | Non-Color | Roughness |
| Metallic | Non-Color | Metallic |
| Normal | Non-Color | Normal Map node → Normal |
| Emission | sRGB | Emission Color |
Use image textures connected to a Principled BSDF for the most predictable glTF transfer. Procedural nodes that exist only in your app must be baked into images.
GLB handoff
Round-trip test
| Test | Pass condition |
|---|---|
| Transform | Correct size, orientation, floor contact, and pivot behavior |
| Shading | No black faces, unexpected smoothing, normal-map inversion, or missing textures |
| Material | Base color and reflection response look plausible under engine lights |
| Structure | Names are legible and required meshes remain separate |
| Reimport | A change in your app re-exports and updates cleanly without destroying engine-side work |
environment_set_v01.glb + validation screenshotKeep source textures beside the asset or embedded according to the team convention.Free, fast, and professional apps
Seams, unwrap methods, checker testing, density control, island packing, and glTF export live beside the model. It is the default free choice when students need to understand the full handoff.
Open Blender UV docs ↗Automatically creates UV maps and templates for simple low-poly models, with 2D and direct 3D painting. Best for a first successful unwrap, especially for box-built assets.
Try Blockbench ↗A dedicated UV application for fast cutting, unfolding, density control, and packing across production assets. It offers a trial, paid Indie/Pro plans, and academic licensing.
See RizomUV plans ↗Not a replacement for clean UVs, but one of the best stress tests for them. Baking and layer-based painting expose overlaps, density changes, mirrored errors, and insufficient padding quickly.
Explore Painter ↗RizomUV currently advertises a full trial and free academic licensing. Confirm eligibility and current plan terms on the official page.
Definition of done
0/4 checked
Your room and prop are now dependable production assets.
References: Khronos glTF overview, Blender UV unwrapping, and Godot 3D scene import. Use the Rosetta tables for the same steps in other apps.