Find your way
Meet your OS, organize files, and practice everyday shortcuts.
Desktop & files →The terminal is the window. The shell interprets what you type. macOS commonly uses zsh; Linux commonly uses Bash. For Windows examples, select PowerShell, not Command Prompt. WSL is a separate Linux environment and uses Linux examples.
A prompt such as student@computer:~$ or PS C:\Users\student> says the shell is ready. Type only the command, not the prompt. Press Enter to run. A command usually has a name, options and arguments: ls -a means list, including hidden entries. PowerShell uses named parameters such as -Path.
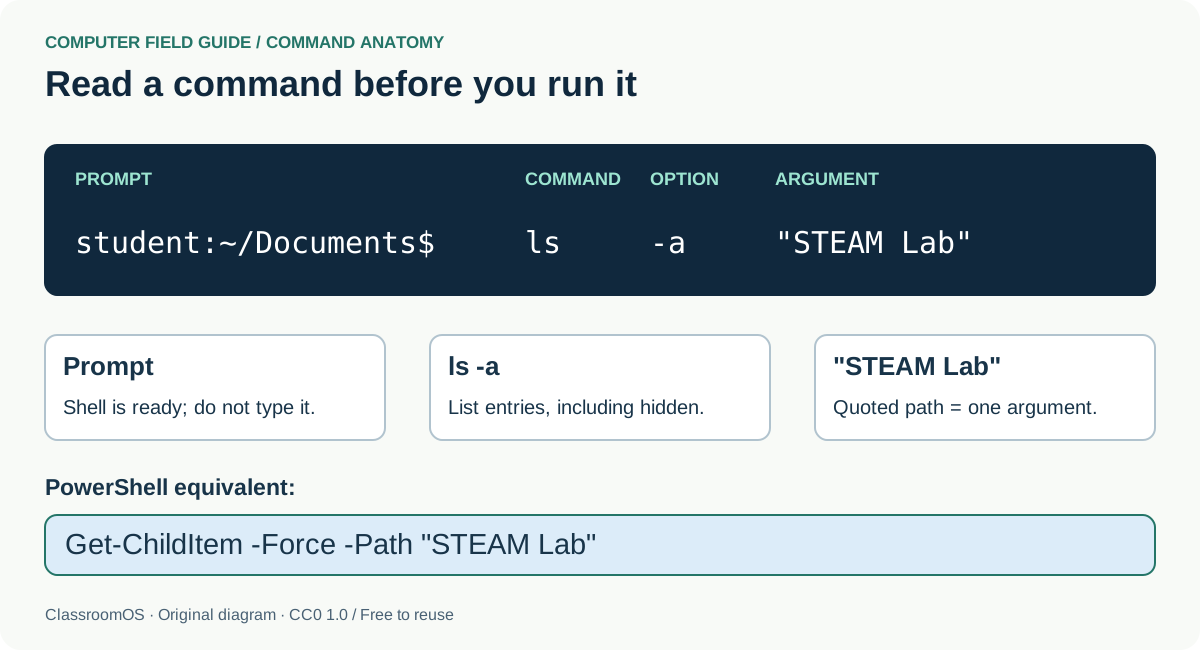
Read the prompt separately from the command. The Unix ls -a and PowerShell Get-ChildItem -Force examples include hidden entries; the quoted folder name is one argument.
Original ClassroomOS diagram · CC0 1.0 (public-domain dedication) · Download SVG| Goal | Command | What to notice |
|---|
This is a small simulation, not a connection to your device or an AI service. It supports only the commands listed below and the practice names. Files disappear on reset or reload. It starts in a pretend home containing Documents. Switching OS resets it.
Mission: enter Documents → create PracticeLab → enter it → create notes.txt → list it → return to Documents. Use the reference above. The simulator accepts cd on every platform.
CURRENT FOLDER
Open the terminal and check where you are first. In your file manager, make a new, empty folder named TerminalPractice in a location you own. Type cd followed by that folder’s quoted absolute path (you can often drag the folder into the terminal to insert its path). Check your location again. Use the selected commands to create PracticeLab and an empty notes.txt inside it. Check the result in your file manager. If those names already exist, choose a fresh practice folder. Leave cleanup to the file manager’s Trash.
Terminal survival skills: Tab often completes a path; Up Arrow recalls a command (read it before pressing Enter). Ctrl–C requests an interrupt but cannot undo changes already made. clear / Clear-Host clears the display, not files. exit ends the shell. No output can mean success: list the directory to check. A password prompt may show no characters as you type; this lesson requires no administrator password.
Computer Science pathway / Foundations
COMPUTER CONFIDENCE / FOUNDATIONS
Mac, Windows, Linux: different controls, shared ideas. Learn to organize your work, find your way through directories, and explain a terminal command before you run it.
Grades 6–12 · Three 50-minute sessions · No installation or AI account required
Meet your OS, organize files, and practice everyday shortcuts.
Desktop & files →Predict a command’s effect, run it, then inspect what changed.
Open the practice lab →Review AI advice and demonstrate a project a partner can navigate.
Review & demonstrate →PHOTO HISTORY / FROM COMPUTER ROOMS TO PERSONAL DESKTOPS
Operating systems grew as computers needed to serve more programs, people and devices. These real photographs show people and machines behind that story. Milestone dates describe the history; each caption separately identifies what the photograph actually shows.
Click any photograph to present it full-screen. Use the arrow keys to step through the collection. Some are public domain; others are freely reusable under the Creative Commons license shown.
1960s · Shared machines
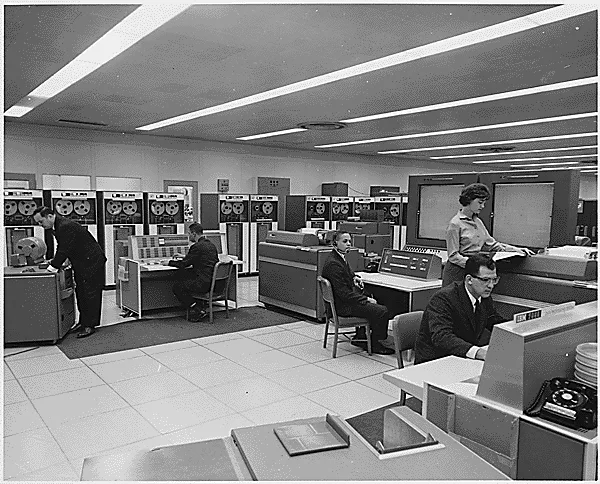
NASA’s computer room with two IBM 7090s, around 1962. Large shared computers made scheduling, storage and device management essential. Early batch systems queued jobs; time-sharing systems let several people interact with a machine through terminals. This photo shows the hardware and operators, not a particular OS screen.
Photo: NASA / U.S. National Archives, NAID 278195 · Source record · Public domain in the United States (NASA). Unaltered source photograph.Look & discuss: Which parts of this room now fit inside a laptop? Why would a shared computer need to manage whose program runs next?
1969 · Unix begins
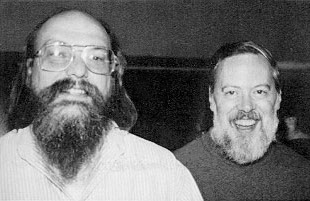
Ken Thompson (seated) and Dennis Ritchie at Bell Labs in 1973, several years after Unix began in 1969. Unix helped establish the command-oriented working environment behind many tools we still use. Directories, processes and small cooperating programs made text commands powerful. The original archival image is small; enlarging it cannot reveal extra detail.
Photo: Unknown photographer; via the Jargon File and Wikimedia Commons · Source record · Public domain (source record). Unaltered source photograph; original resolution 310 × 201.Look & discuss: Where is the keyboard? Where might the actual computer be? How does this compare with the practice terminal in this lesson?
1981 → 1985 · DOS and early Windows
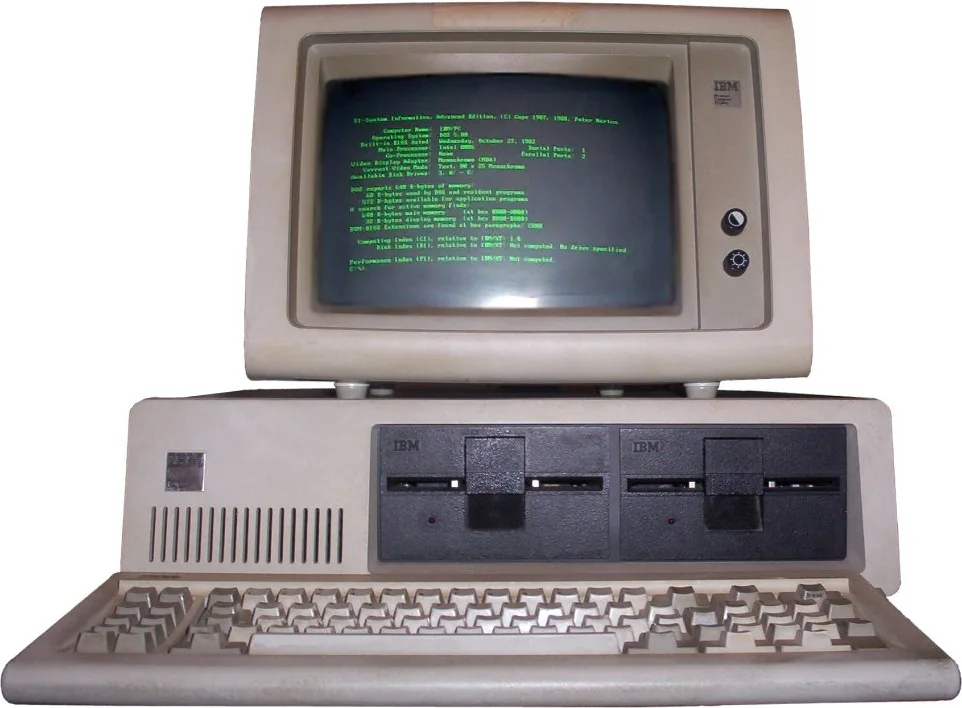
The IBM PC model introduced in 1981 helped bring command-driven personal computing into offices and homes. This later photograph shows a preserved machine running MS-DOS 5.0, not its original 1981 software. DOS users typed commands to run programs and manage files. Windows 1.0 arrived in 1985 as a graphical environment extending MS-DOS; today’s Windows is a much later OS family.
Photo: Boffy b / Wikimedia Commons · Source record · CC BY-SA 3.0. Unaltered source photograph.Look & discuss: Find the disk drives and text display. What would you need to know before opening a file without clickable icons?
Read the historical source · Microsoft’s Windows 1.0 history
1984 · Macintosh
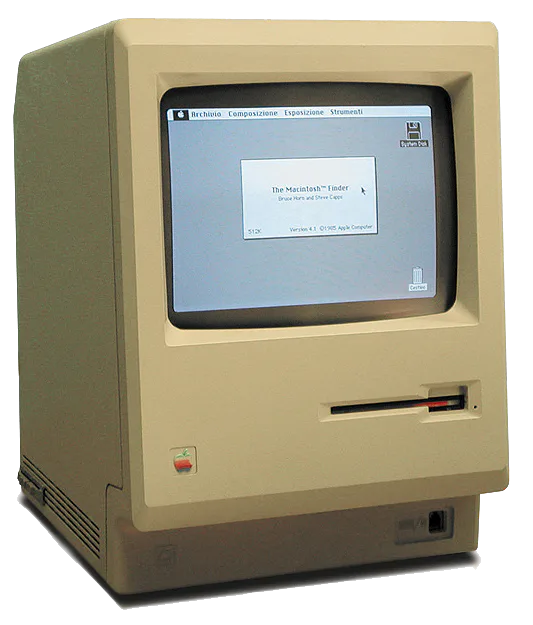
The 1984 Macintosh helped popularize mouse-driven graphical computing. Its early system software presented familiar ideas such as windows, icons and a desktop. It was not the first graphical computer, and its classic system software is different from modern macOS. A separate keyboard and mouse (not shown in this photo) let users type and select visible targets instead of remembering every command.
Photo: All About Apple museum; source edits by TDS and Grm wnr / Wikimedia Commons · Source record · CC BY-SA 3.0. Existing background-removed photographic derivative, reused without further edits.Look & discuss: Which actions in Finder still use the desktop metaphor? What can a picture communicate more quickly than a typed command?
1991 · Linux begins
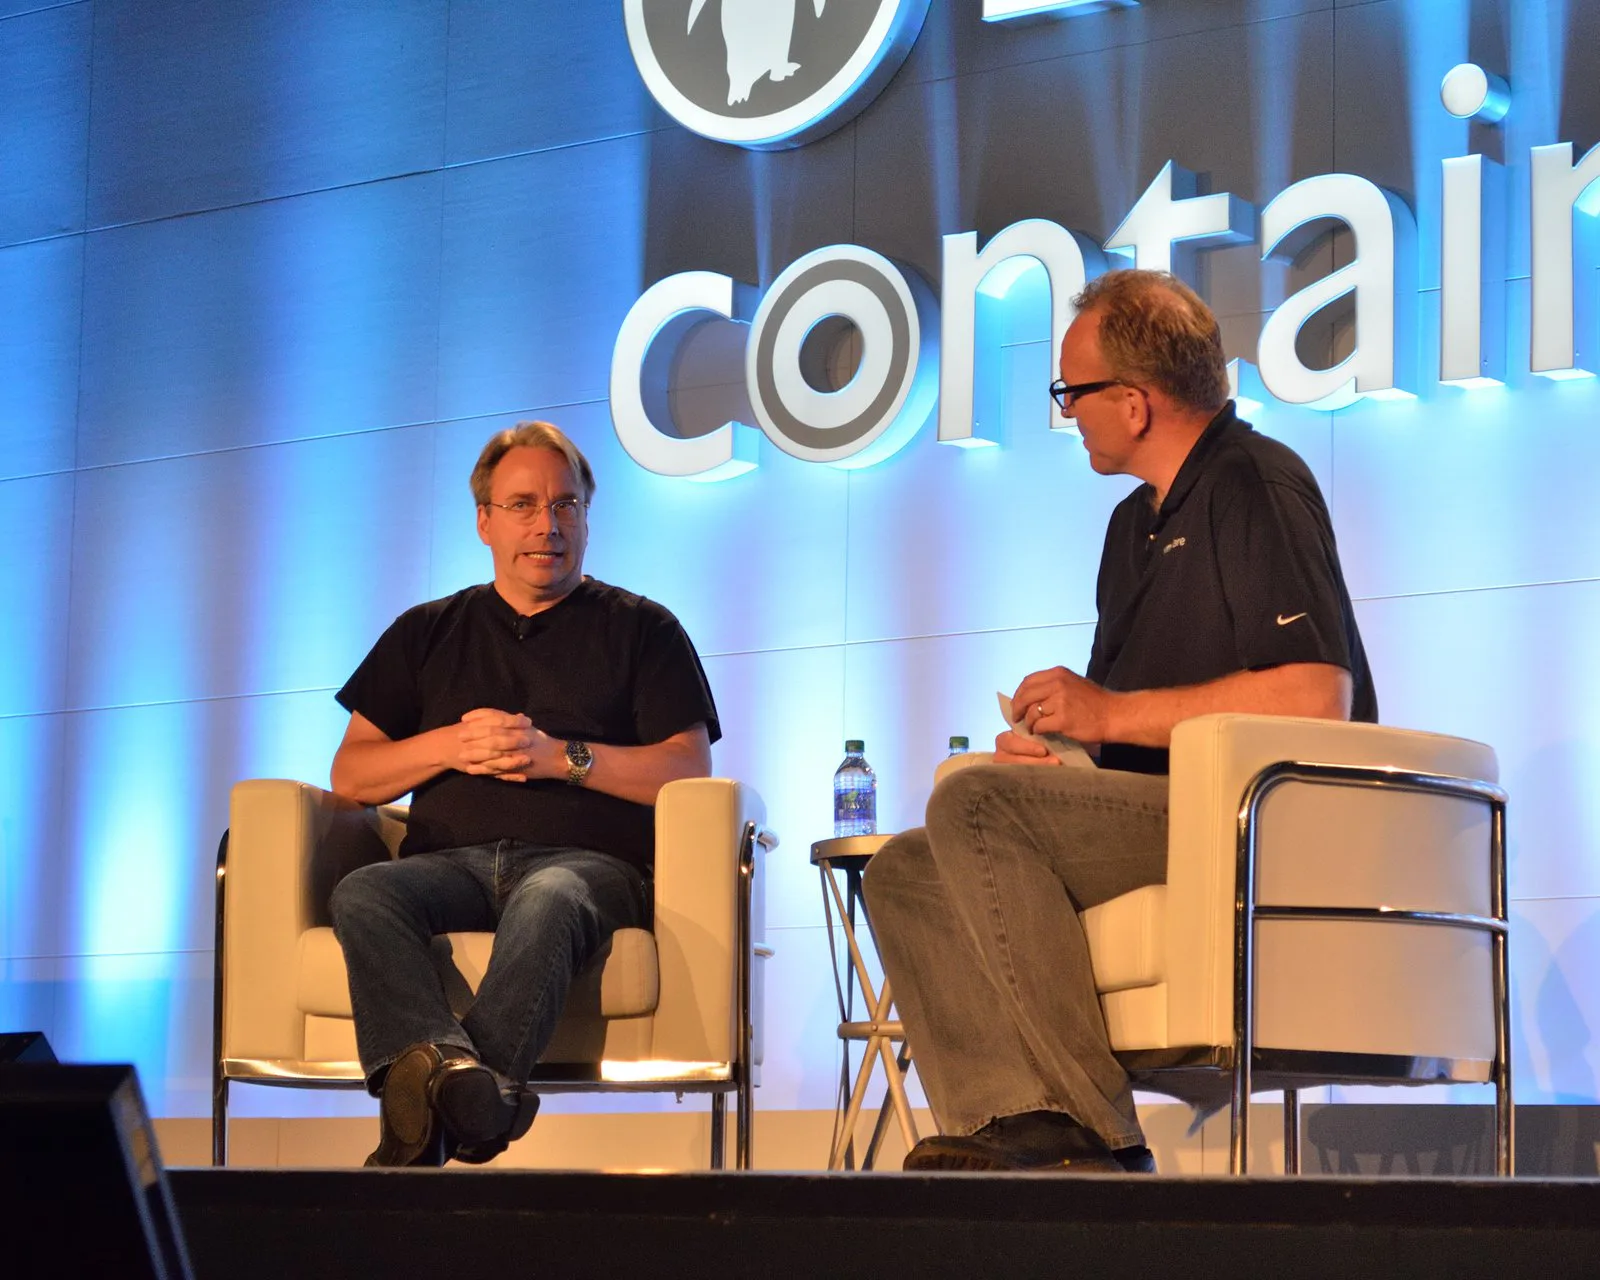
Linus Torvalds began the Linux kernel in 1991; this discussion photograph was taken much later, at LinuxCon in 2016. A kernel is the core that manages hardware and processes. A usable Linux distribution combines it with system tools, applications and often a graphical desktop. Linux is Unix-like, rather than a copy of the original Unix source code.
Photo: Raysonho @ Open Grid Scheduler / Grid Engine · Source record · CC0 1.0. Resized to 1600 pixels wide and JPEG recompressed; no crop.Look & discuss: Why do Ubuntu and Fedora look different even though both use Linux? Which part is the kernel and which part is the desktop?
An operating system (OS) manages hardware, memory, storage, apps, user accounts and permissions. An app does a particular job; the OS coordinates the computer underneath it. The desktop is one interface to it. A terminal is another.
Finder browses files. The Dock launches apps. The menu bar follows the active app. Open System Settings to change preferences. Closing a window may leave the app running; Command–Q quits it.
File Explorer browses files. Start searches and launches apps. The taskbar switches windows. Settings controls preferences. Windows Terminal can host PowerShell, Command Prompt or Linux; each uses different commands.
Linux comes in distributions such as Ubuntu and Fedora. The desktop and file manager vary. Search the app launcher for Files, Settings or Terminal. This lesson uses Bash-style commands for Linux.
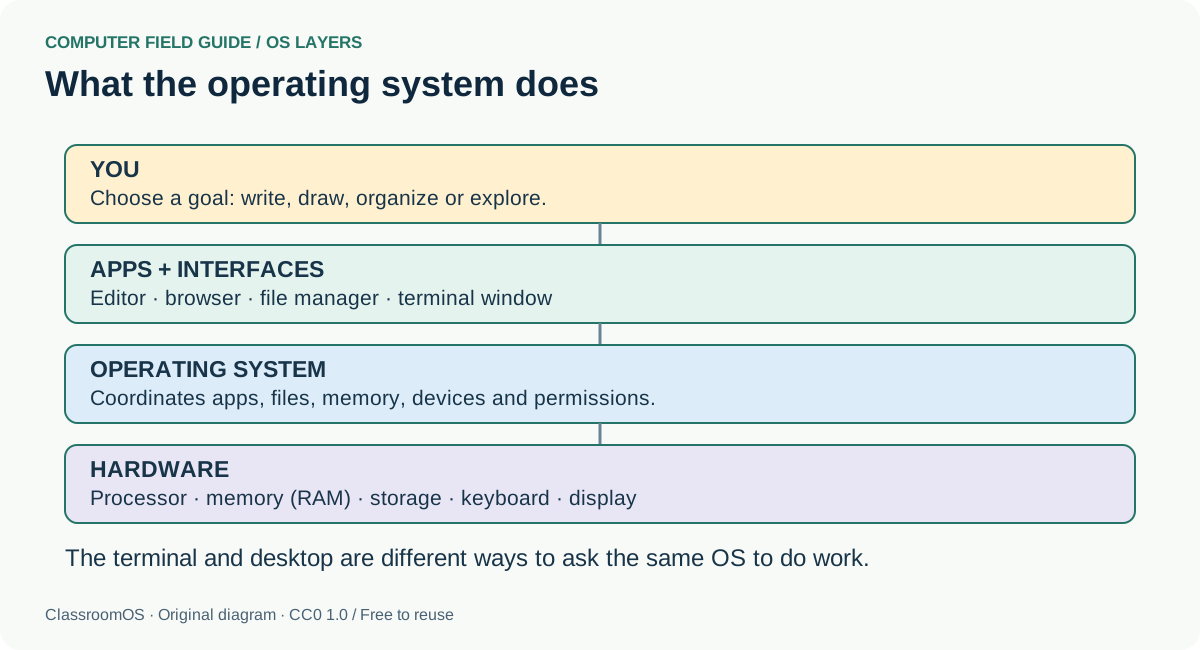
The operating system sits between apps and hardware. The desktop and terminal are interfaces through which you request work.
Original ClassroomOS diagram · CC0 1.0 (public-domain dedication) · Download SVGIf an app freezes: wait briefly, save other work, then use Force Quit on Mac, Task Manager on Windows, or System Monitor on Linux. Ending an app can lose unsaved work. On a school computer, ask before installing software or changing account settings.
Install apps from trusted stores or official publishers with teacher approval. Keep updates enabled. Give apps only the permissions they need. Eject removable drives before unplugging. Keep a separate backup of important work: cloud sync can also sync an accidental deletion. Never share passwords or recovery codes.
A file holds data. A directory (folder) contains named files and other directories. A path is an address through that tree. Your home directory contains your personal work; it is different from the filesystem root.
Home (your account)
└── Documents
    └── STEAM Lab
        ├── notes.txt
        ├── images
        │   └── robot.png
└── drafts | System | Example absolute path | Home shortcut in this lesson’s shell |
|---|---|---|
| Mac | /Users/student/Documents/STEAM Lab/notes.txt | ~ |
| Windows PowerShell | C:\Users\student\Documents\STEAM Lab\notes.txt | $HOME |
| Linux | /home/student/Documents/STEAM Lab/notes.txt | ~ |
These are examples, not guaranteed locations. Accounts, OneDrive, iCloud and language settings can change paths. An absolute path starts at a root (or a Windows drive). A relative path starts at your current directory: images/robot.png. A dot . means here; .. means the parent. Put paths with spaces in quotes: cd "STEAM Lab". Names and case matter; Linux usually distinguishes Notes.txt from notes.txt.
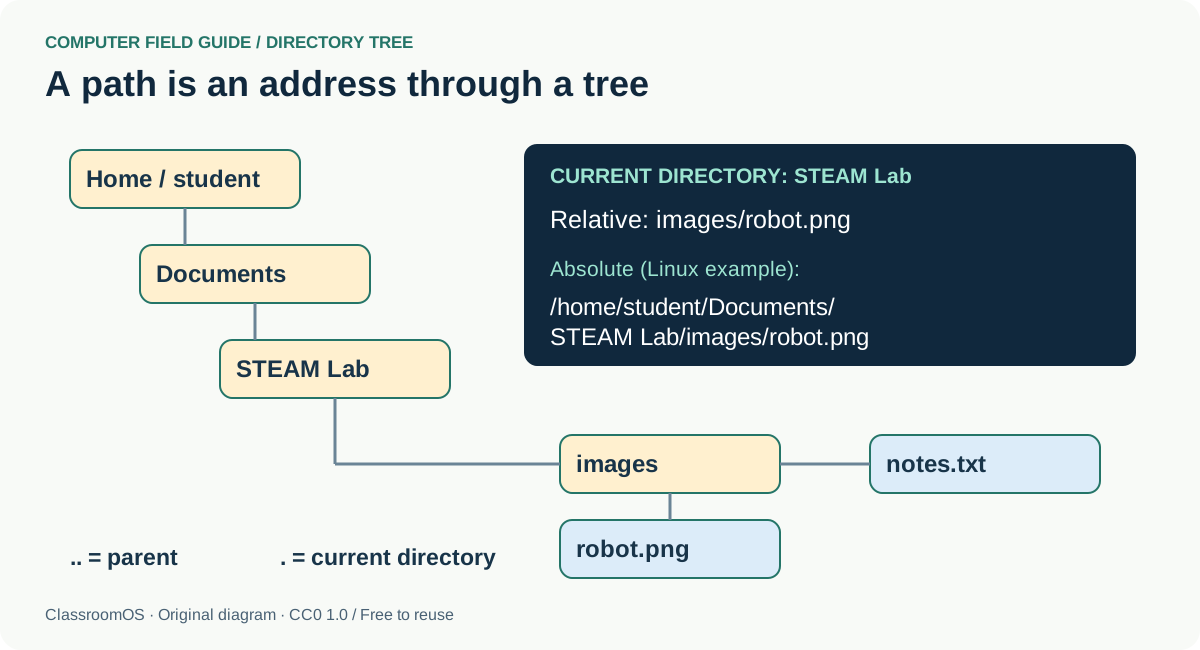
Trace the branches from your home directory to robot.png. A relative path begins at your current directory; an absolute path begins at a filesystem root.
Original ClassroomOS diagram · CC0 1.0 (public-domain dedication) · Download SVGSTEAM Lab, with images and drafts inside.notes.txt in STEAM Lab. On Mac, set TextEdit to plain text first. Turn on filename extensions in your file manager’s view settings so you can see the actual type.notes-v2.txt. Moving changes its location; copying keeps the original. Verify both before removing anything.File literacy: .txt is plain text, .png is an image, .pdf is a document and .zip is an archive you extract. Renaming an extension does not convert the file. A desktop shortcut, Mac alias or Linux symbolic link points to another item; it is not a backup. Downloads is a landing area, not a long-term filing plan. Hidden files often hold settings: leave unfamiliar ones alone.
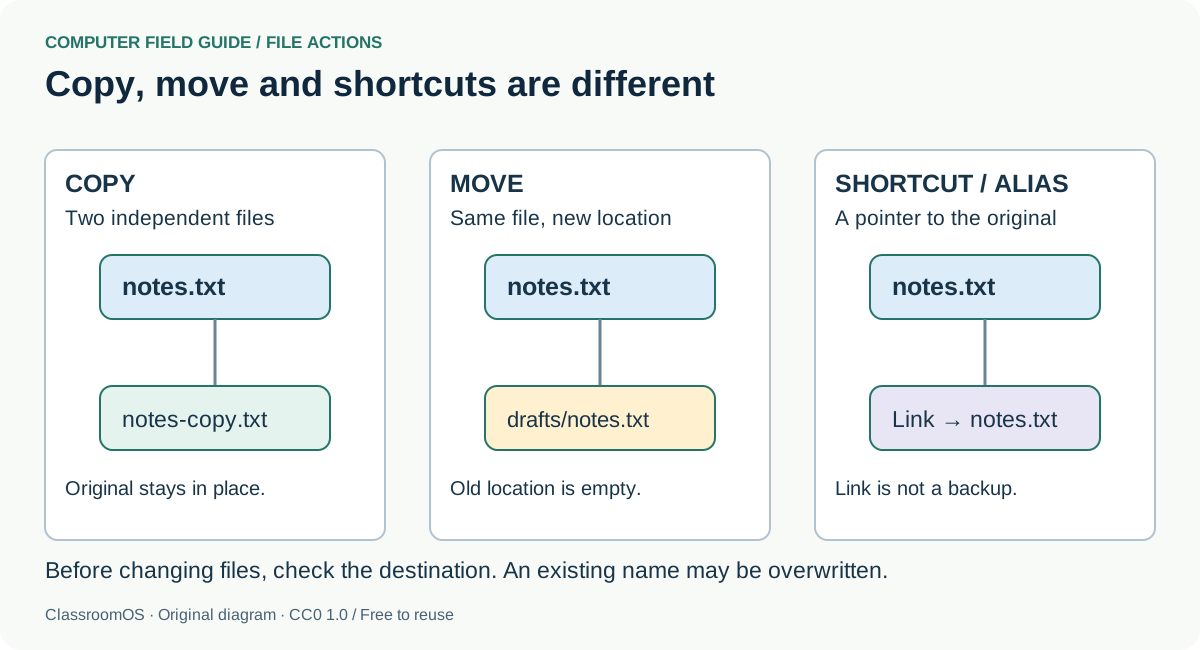
Copy preserves an original, move changes a file’s location, and a shortcut points to an existing item. A shortcut cannot replace a backup.
Original ClassroomOS diagram · CC0 1.0 (public-domain dedication) · Download SVGHold the modifier keys, then press the final key. Shortcuts can vary by application, keyboard and Linux desktop; menus show the active shortcuts.
| Action | Mac | Windows | Linux (common desktops) |
|---|---|---|---|
| Copy / paste / undo | ⌘ C / ⌘ V / ⌘ Z | Ctrl C / Ctrl V / Ctrl Z | Ctrl C / Ctrl V / Ctrl Z |
| Save / select all / find | ⌘ S / ⌘ A / ⌘ F | Ctrl S / Ctrl A / Ctrl F | Ctrl S / Ctrl A / Ctrl F |
| Switch apps | ⌘ Tab | Alt Tab | Alt Tab |
| Launch/search apps | ⌘ Space | Windows key, then type | Super key, then type (often) |
| Screenshot region | Shift ⌘ 4 | Windows Shift S | Use the Screenshot app; keys vary |
| Lock screen | Ctrl ⌘ Q | Windows L | Often Super L; check Settings |
| New file-manager folder | Shift ⌘ N | Ctrl Shift N | Often Ctrl Shift N |
| Browser new / reopen tab | ⌘ T / Shift ⌘ T | Ctrl T / Ctrl Shift T | Ctrl T / Ctrl Shift T |
Try it: type a sentence, select all, copy, paste, undo, and save. Then switch apps and return. In a terminal, Ctrl C usually interrupts a command instead of copying. Mac Terminal uses Command–C/V for copy/paste; many Linux terminals and Windows Terminal use Ctrl–Shift–C/V.
AI can translate a goal into shell syntax, explain an error and compare commands. It can also invent options, assume the wrong OS or suggest commands that overwrite work. It does not know your actual files unless you give it access. Knowing your shell and current directory is still your job.
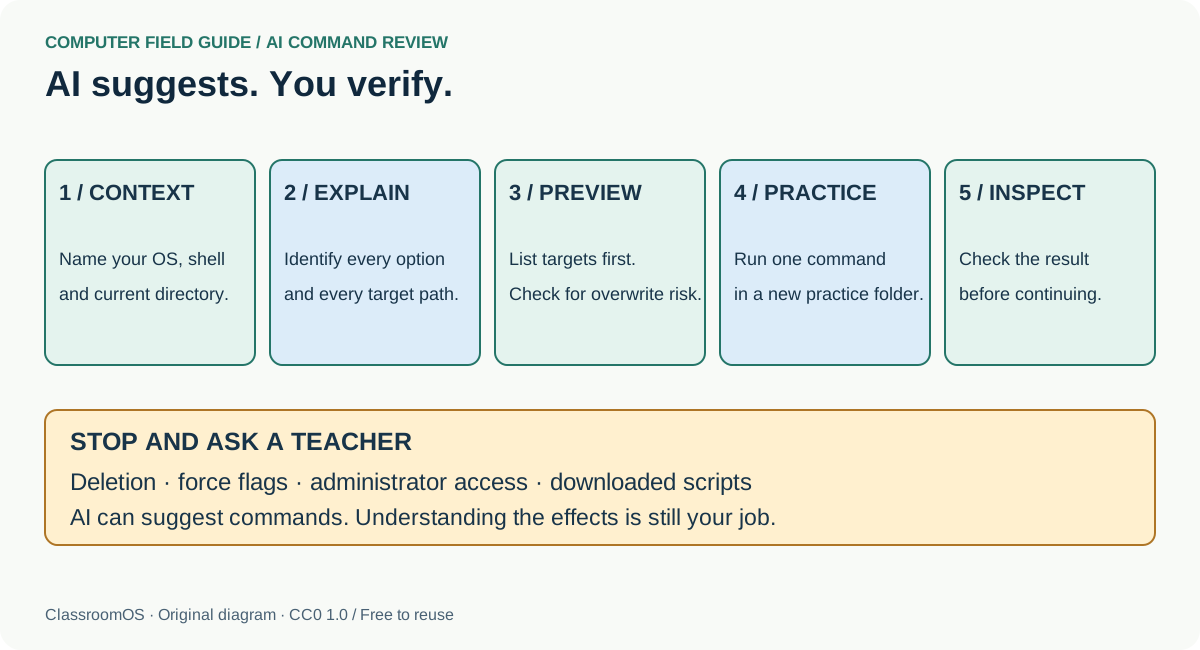
Give AI your context, ask for an explanation, preview targets, practice in an empty folder, then inspect the result. Pause when a suggestion requires elevated access or could delete work.
Original ClassroomOS diagram · CC0 1.0 (public-domain dedication) · Download SVGrm -r or Remove-Item -Recurse), uses force flags, formats a drive, changes permissions broadly, requests sudo/administrator access, or downloads code and pipes it into a shell (curl … | sh). Wildcards such as * can target many files. > can overwrite an existing file. These are warning patterns to recognize, not commands to practice. Terminal deletion often bypasses Trash and there is no universal undo.An AI suggests Remove-Item -Recurse -Force .\* to “tidy your project.”
Stop. It targets matching items in the current directory, including nested contents, with force. Confirming the directory alone does not make deletion safe. Ask for a read-only listing, identify unwanted files with your teacher, back up work, then use the file manager’s Trash on specific practice items.
An AI suggests mkdir "My Project" but you are in a system directory.
The command creates a directory, but the location is wrong. Navigate to a folder you own, confirm the location, check whether the name already exists, then create it. Do not elevate permissions.
Session 1: 10 min OS tour, 25 min file mission, 10 min shortcuts, 5 min explain a path. Session 2: 10 min shell demonstration, 20 min simulator, 15 min real practice in approved folders, 5 min error reflection. Session 3: 15 min AI command review, 25 min final mission, 10 min quiz and partner demonstration.
Assess observable skills: an organized saved project; correct path explanations; independent navigation; a command explanation covering scope and risk. Require a correct safety explanation before real terminal practice. No AI account? Partners can role-play the AI and reviewer using the examples above. Do not ask students to change managed-device settings.
Interfaces and shortcuts vary by version. These official references cover the commands and desktop skills used here.


